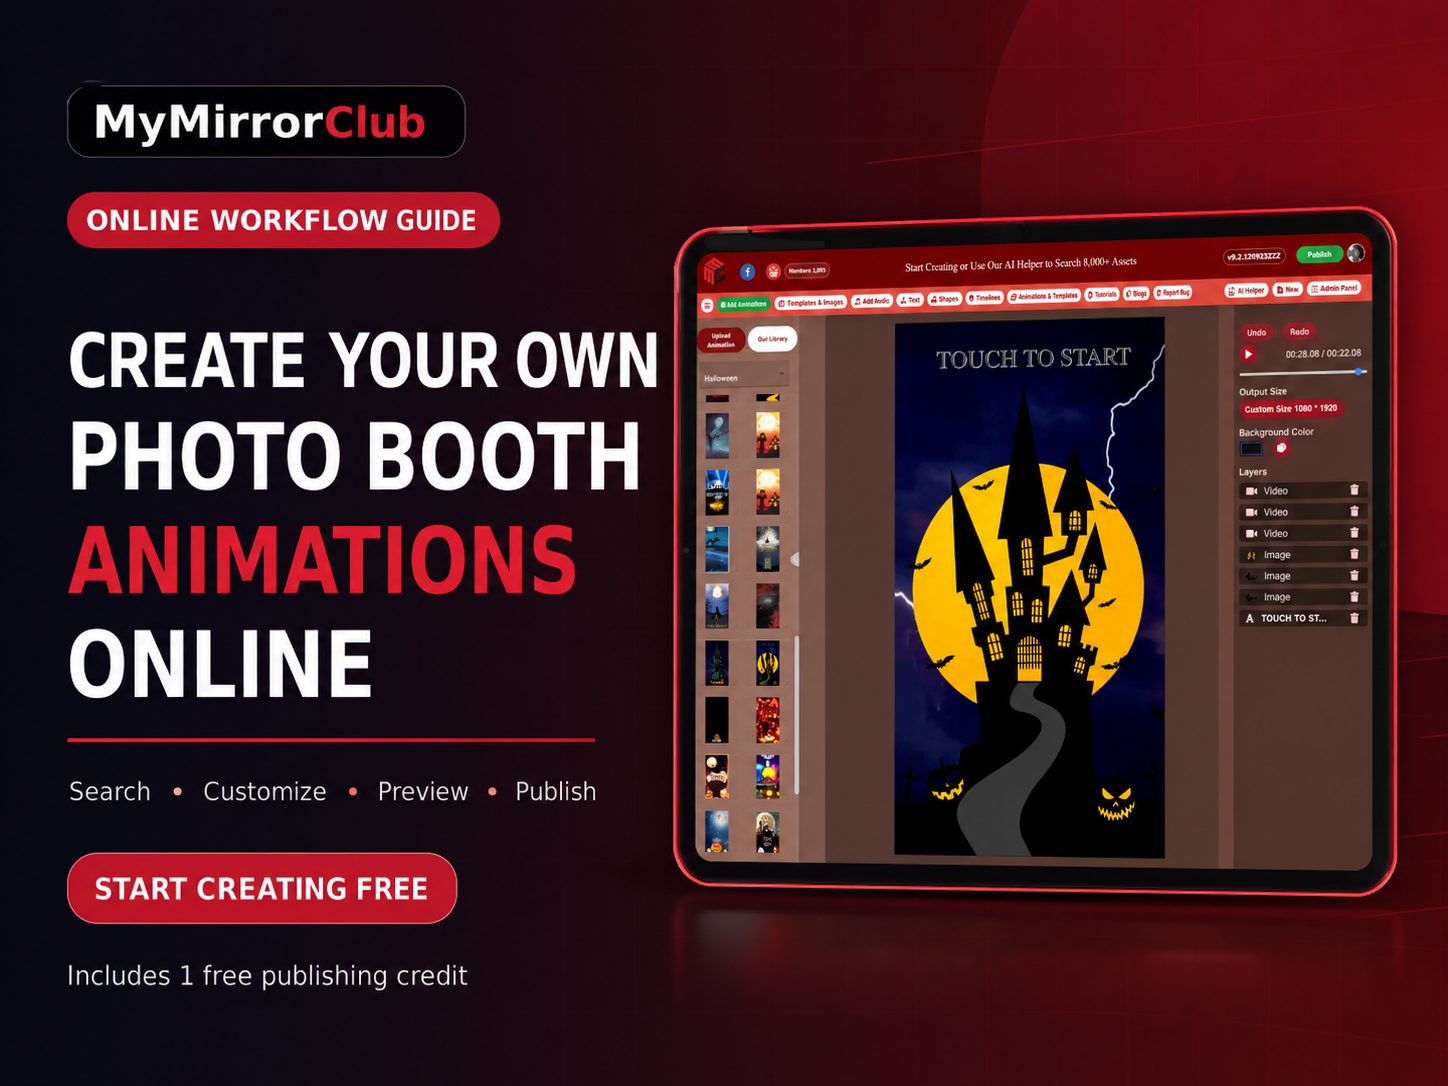
Creating a stunning and personalized photo booth template has never been easier, thanks to the MyMirrorClub editor. Whether you’re a professional photo booth owner or just getting started, our intuitive editor allows you to design templates with images, text, shapes, and more—all without needing advanced design skills.
In this blog, we’ll walk you through the process of designing a photo booth template and introduce you to our latest video tutorial, which explains how to work with layers and add components effectively.
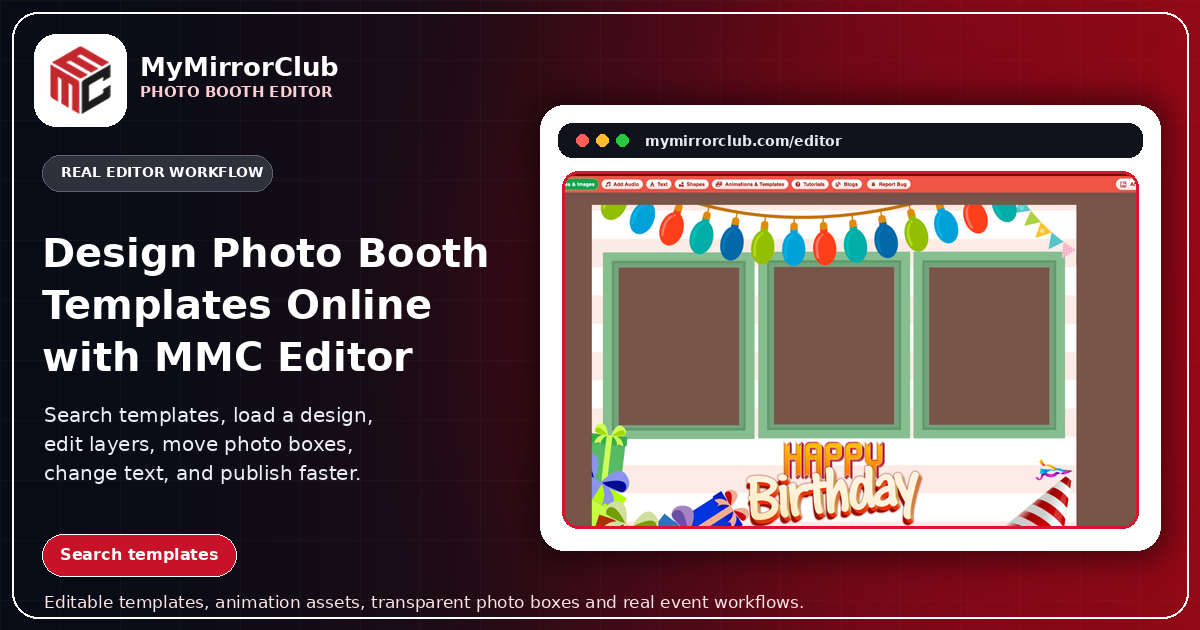
Step-by-Step Guide to Designing Your Template
1. Accessing the MyMirrorClub Editor
To start designing, log in to your MyMirrorClub account and navigate to the editor. Here, you’ll find a variety of pre-made templates that you can customize or the option to create a brand-new template from scratch.
2. Understanding Layers in the Editor
Layers play a crucial role in designing a template. Just like professional design software, our editor lets you stack different elements such as backgrounds, text, and images in layers, ensuring precise control over your design.
To help you master layers, we’ve created a video tutorial that walks you through the process of managing them efficiently. Be sure to watch the tutorial below to get a full understanding.
3. Adding Images
-
Click on the ‘Add Image’ button and upload your desired image or choose from the available library.
-
Adjust the size, position, and rotation to fit your design.
-
Use the layering tool to place images in front of or behind other elements.
4. Customizing Text
-
Select ‘Add Text’ and type your desired message.
-
Choose from a variety of fonts, sizes, and colors to match your theme.
-
Drag and position the text where you need it.
-
Apply shadow or stroke effects for added flair.
5. Adding Shapes & Other Design Elements
-
Click on ‘Shapes’ to add decorative elements such as circles, squares, or custom graphics.
-
Adjust the colors, sizes, and opacity to blend seamlessly with your template.
6. Saving & Exporting Your Template
Once you’re satisfied with your design, save your template for future use. You can download the final version and load it onto your photo booth software for an instant, professional-looking experience.
Watch Our Video Tutorial
To make this process even easier, we’ve created a detailed video tutorial that demonstrates exactly how to use the MyMirrorClub editor. This video covers:
-
How to navigate the editor
-
Managing and organizing layers
-
Adding and customizing components
Final Thoughts
Designing a photo booth template with MyMirrorClub is quick, easy, and fun. Our powerful editor gives you complete creative control, ensuring that every event you cater to has a unique and eye-catching template.
Ready to start designing? Visit MyMirrorClub.com and create your next masterpiece today!